

How many times have you been working in Epicor P21 and thought, “Why can’t that box just be checked for me?” Good news! If you have Dynachange Business Rules for Epicor P21, you can do just that. I often get asked about what the benefit of business rules is. I have written articles in the past about what business rules are and what you can use them for. However, I have never provided an example of how to write a rule. Today, we are going to do just that.
What You Need
Before you start writing business rules, you must have a few things in order.
- A working installation of Epicor P21, with the business rules extension activated (seems obvious, I know).
- Visual Studio from Microsoft. The free community edition will work just fine.
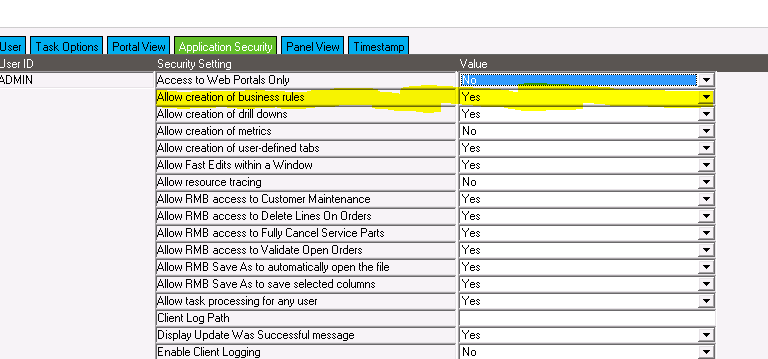
- Business rule creation rights for your user account in P21. (Check the Application Security tab)
Finally, you should choose whether you want to write rules in Visual Basic or C#. It doesn’t really matter which one you choose. Pick whichever one you are comfortable with. Personally, I develop in C# because it has a similar syntax to another language I write in.
Setting up Visual Studio
Once you have Visual Studio, you will need to create a Class Library project. Open the properties of the project. If you are on version 12.14 or earlier of Epicor P21, you will be developing rules using the .NET Framework 3.5. On versions later than 12.14, you will use .NET 4.0.
Select the framework that is correct for your P21 version. You can also set the assembly name and default namespace. The assembly name is what your DLL file will be called, so make it something meaningful.
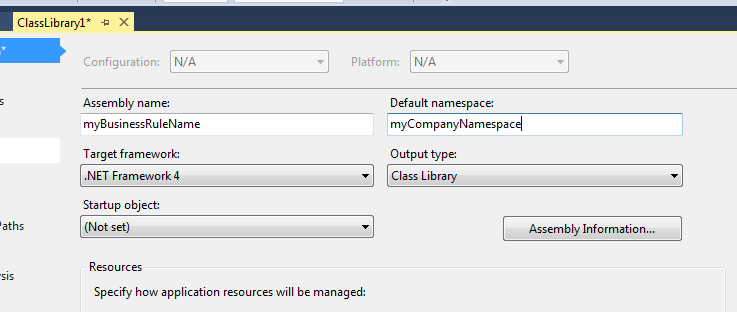
The namespace is not as important, but I recommend you go with something unique to your company, just to prevent any possibility of conflicts.
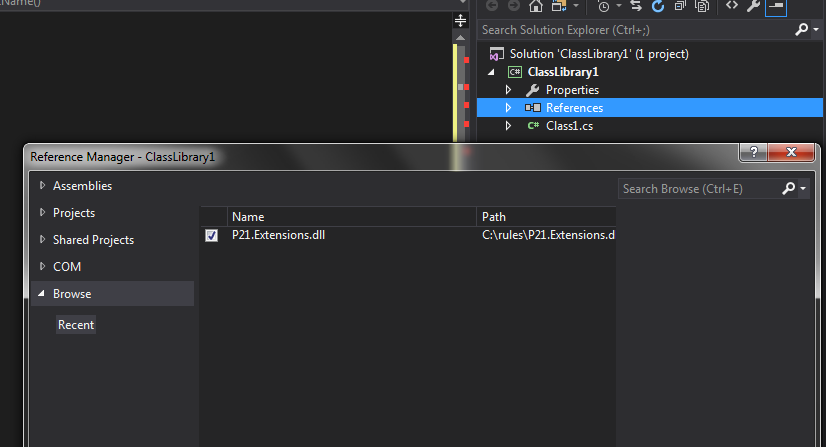
Next, add a reference to the P21 business rule extensions DLL. If you are on 12.14 or earlier, it is called Activant.P21.Extensions.dll. For 12.15 or higher, you will add a reference to the P21.Extensions.dll file. I recommend that you put a copy of this file in a folder that you can access quickly. This reference is required with each business rule project created.
Writing the Business Rule
Now we are ready to start coding. Below is the code:
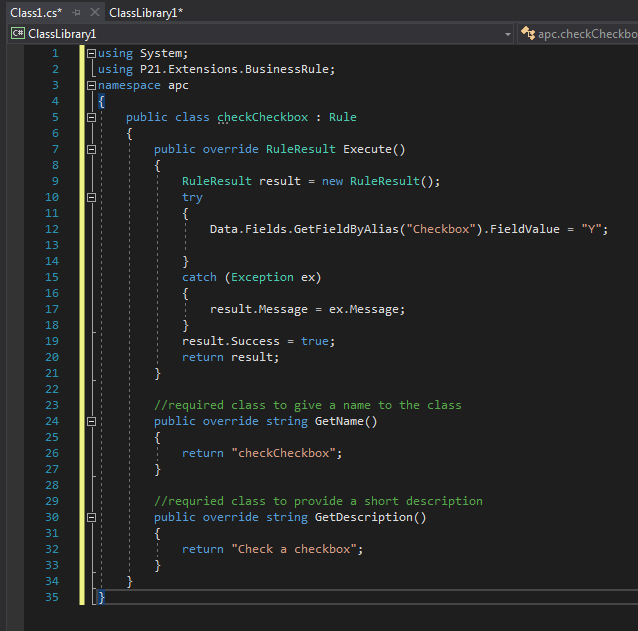
For all rules, the following 3 functions are required: RuleResultGetName GetDescription
At the top of the rule, the 2 using statements just include the references to other functionality you need in your project. In this case, the System and P21.Extensions.BusinessRule resources are needed in the project.
Next comes the namespace declaration, which basically just prevents collisions between something another developer writes that has the same class name.
All of the heavy lifting in the business rule happens in the RuleResult function. I recommend putting the rule code into a try/catch block as shown in the example above. This makes the rule more fault tolerant, and gives the user feedback when things go awry.
This rule is very simple. We are just going to set the value of a checkbox to “Y”. In order to use the same rule on different checkboxes throughout the Epicor P21 program, I recommend using an alias to identify the checkbox. The Data.Fields.GetFieldByAlias("FieldName").FieldValue statement accomplishes this. FieldName can be set to anything you want to call it, as long as it is meaningful. In this example, I simply used “Checkbox”
When your rule is complete, build it using the Build menu. Copy the DLL file that was created into your rules folder. You can find the location in System Settings.
Create the Rule in Epicor P21
Once the rule is in the rules folder, you can add it to P21. Note that Prophet 21 loads the rules files when you open the application. That means if P21 is already open, you need to close and reopen it. These files are locked when the Prophet 21 application is open. You must close Epicor P21 if you wish to copy in a new version of the DLL file.
Open the window/screen where you want the rule to run. If you want to trigger the rule based on changing another field (think putting in a customer or pick ticket number, etc), right click that field and use the right menu to select Dynachange->Dynachange Rules->Create Business Rule.
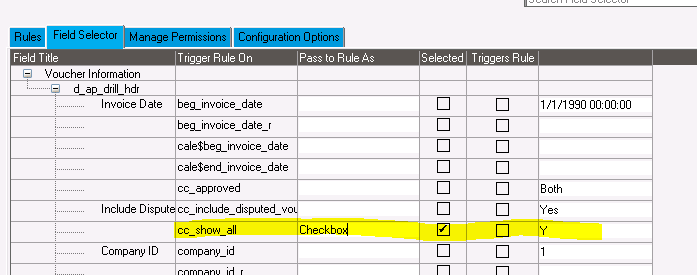
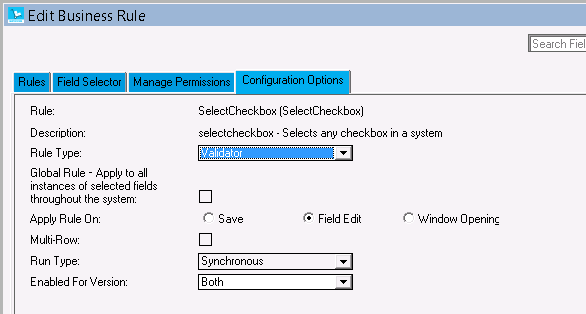
On the field selector, fill in your alias name (“Checkbox”) in the Pass to Rule As field, and make sure selected is checked. Then, on the Configuration Options tab select the rule type. In this case, I chose validator. A validator rule executes after P21’s code execution has completed.
Click the Load Fields and Test buttons to make sure the rule passes testing. Once it does, save it, and then test the rule to make sure it is working properly.
Last Thoughts
This is an abbreviated tutorial for a very simple business rule. That said, the template for all rules has essentially the same foundation. Most rules tend to have fairly simple usability enhancements. However, you can write much more complex and powerful rules. The limit is usually just your imagination and ability to get it written.
This article is just a starting point to give you a feel for how rules are written and implemented. There is much more information and instruction in the DynaChange Business Rules guide on the Epicor customer website.
For more articles on Epicor P21, visit our Prophet 21 Knowledge Base.


